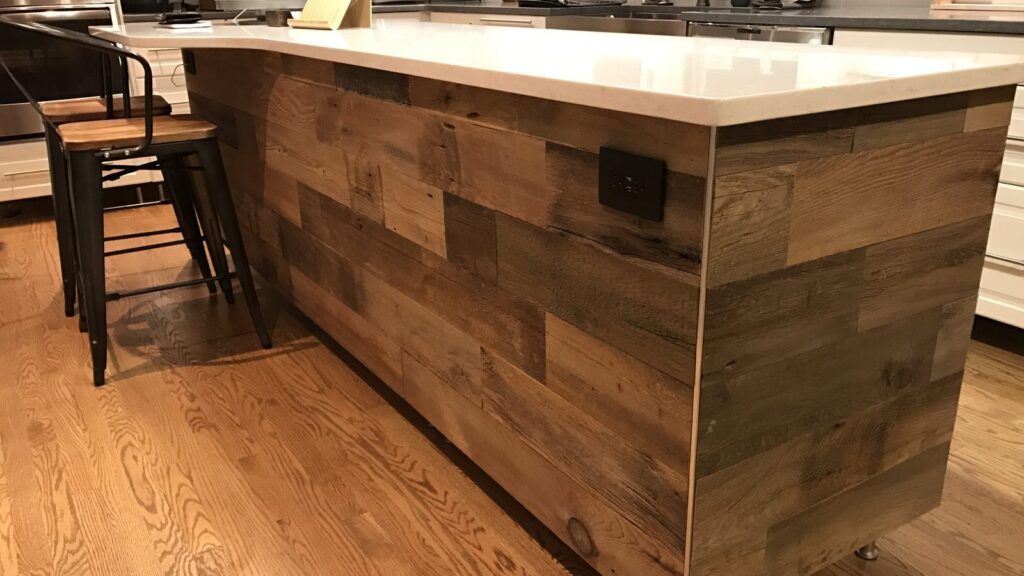
A reclaimed wood kitchen island is a stock cabinet island with real barn wood planks glued to its exposed faces. You don’t need a custom island or a woodworker. One or two 20 sq ft boxes of 3/8 inch thick planks cover the ends and the seating side of most islands, the job takes an afternoon, and the drawers and doors on the working side stay exactly as they are.
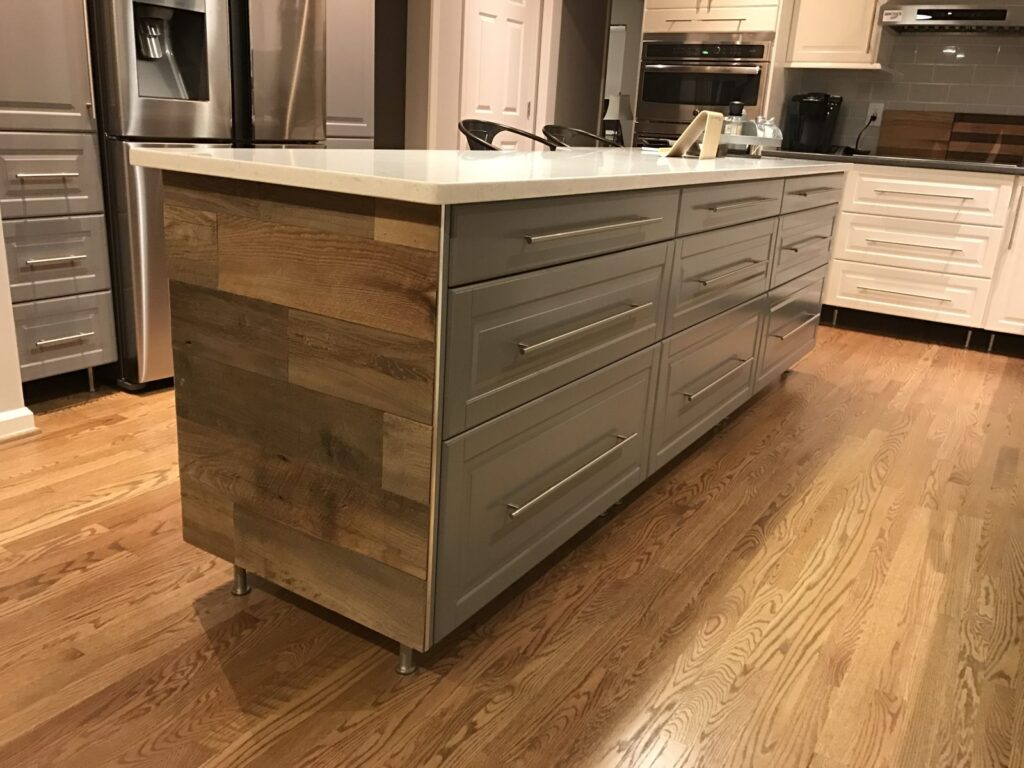
That’s how Heidi did the island in the photos below. White quartz top, grey drawer fronts on the kitchen side, and our brown 3.5 inch reclaimed wood planks on the two ends and the stool side. The planks came off barns that stood for 100 years or more, so the island looks like it was built that way.
Which faces of the island get the wood
Put the planks on the faces people see from the living room and from the stools: the two end panels and the seating side. Leave the drawer and door side alone, because planks on a drawer front add 3/8 inch and the drawer won’t close against its neighbors.
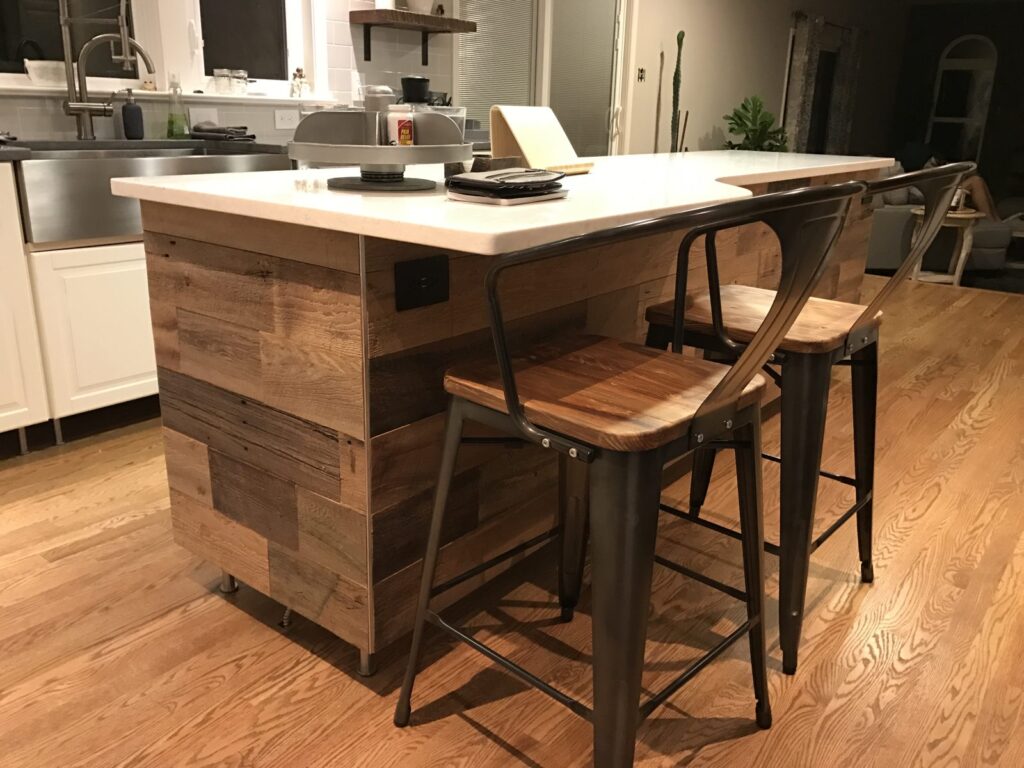
On a standard island the cabinet side panels are flat, 34 to 35 inches tall, and already finished. That’s a perfect base. The counter overhangs the end panels by about an inch, so 3/8 inch of wood tucks under the lip with room to spare. On the seating side the overhang is 10 to 15 inches, and the planks sit well back from anyone’s knees.
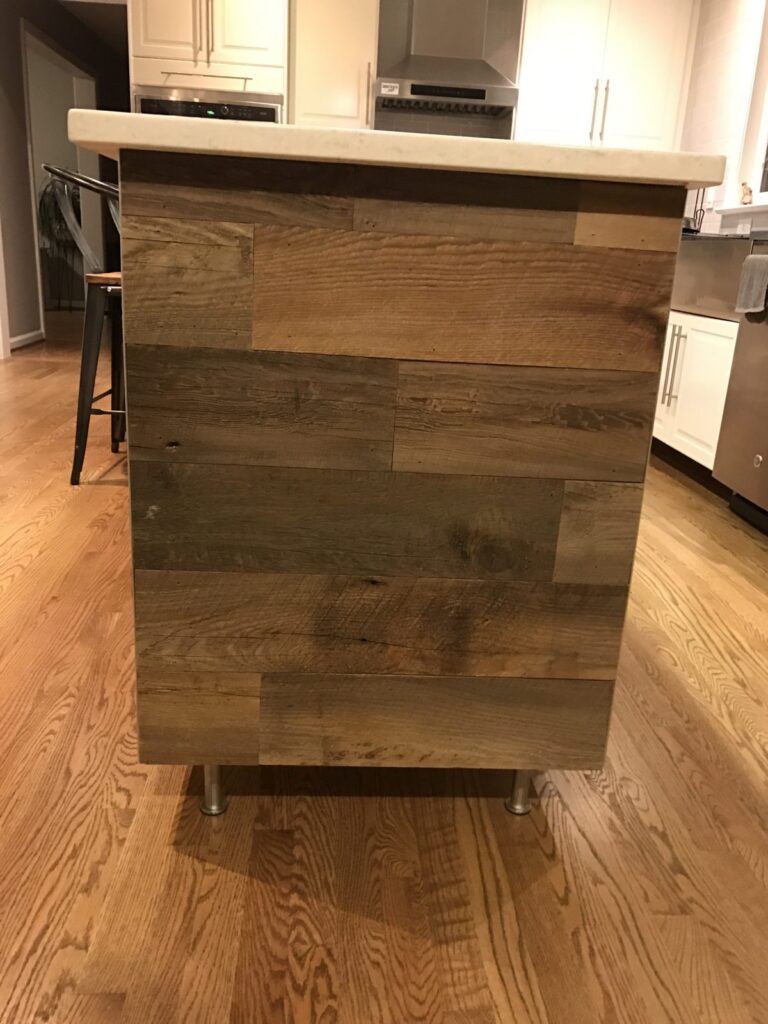
If your island has a toe kick, you’ve got two choices. Run the planks down to the floor, which hides the kick and makes the island read as one solid block. Or stop the planks at the top of the kick and leave the recess, which is the cleaner choice if the island has legs or a lit toe space. Heidi’s island stands on metal legs, so her planks stop at the bottom of the cabinet box and the legs show.
Corners get the same treatment as a wall: butt the end-panel boards into the seating-side boards and alternate which side overlaps on each course. You don’t need a corner piece or any molding. The staggered ends are part of the look.
How much reclaimed wood a kitchen island needs
Most islands need one or two boxes. An island end is about 2 ft deep and 3 ft tall, so each end is 6 sq ft, and the seating side of a 6 ft island is 18 sq ft. Two ends plus the back come to 30 sq ft, or 33 sq ft with 10 percent for cuts, which is two 20 sq ft boxes.
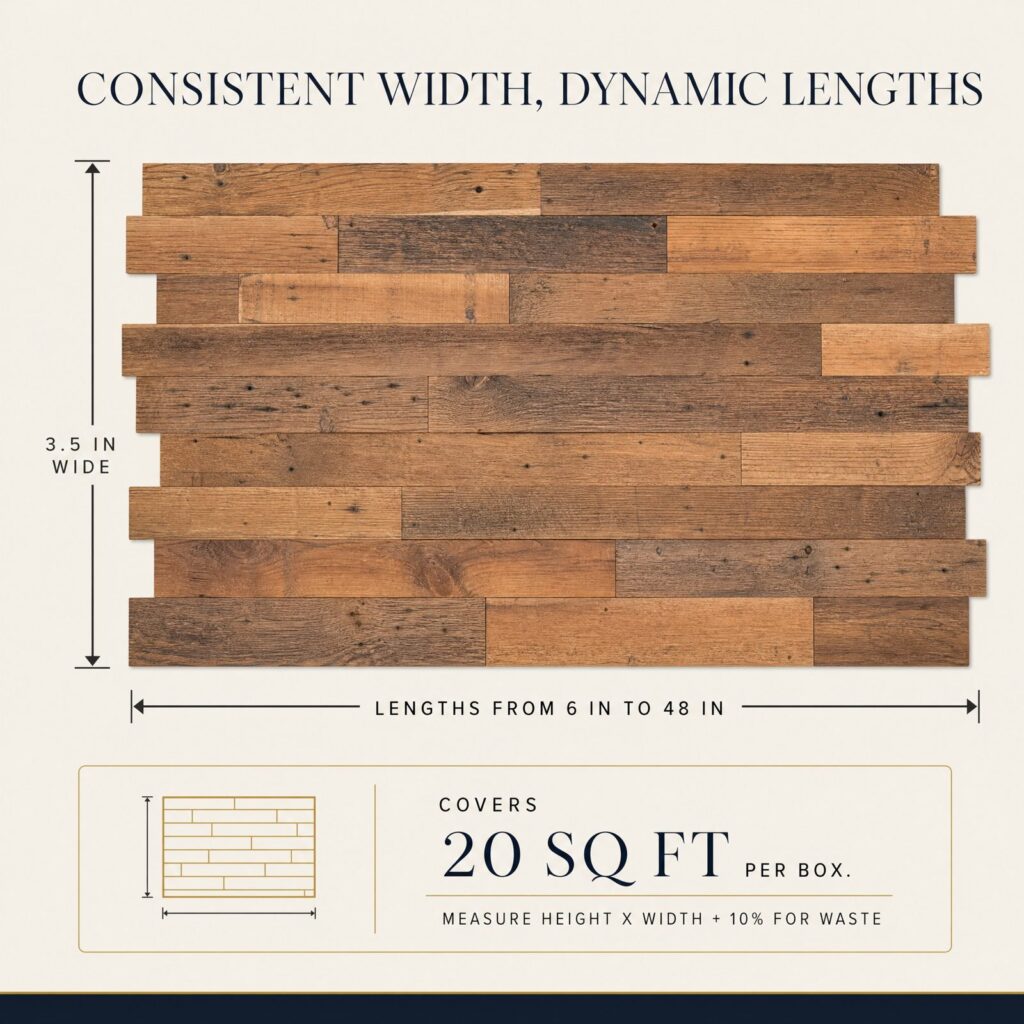
Here’s the quick math for common sizes, all three exposed faces, 10 percent waste included, rounded up to whole boxes:
- Ends only, any length: 12 sq ft, one box, with planks left over for a shelf back or a bench wall
- 6 ft island, ends plus back: 33 sq ft, two boxes
- 8 ft island, ends plus back: 40 sq ft, two boxes
- 10 ft island, ends plus back: 46 sq ft, three boxes
At the current sale price of $10.25 per sq ft, a box of brown 3.5 inch planks is $205, so a 6 or 8 ft island runs $410 in wood. The grey 3.5 inch planks are $13.50 per sq ft, or $270 a box, so the same island is $540 in grey. Every box is over $200, so US orders ship free except to Alaska and Hawaii. Add a $5 tube of construction adhesive and a can of matte polyurethane and you’re done.
Measure only the faces you’ll cover. A 3 ft tall by 2 ft deep end is 6 sq ft no matter how long the island is. If you’re between box counts, round up. Short offcuts from the ends fill the last course on the back, and a few spare boards let you swap any plank whose color you don’t like once it’s on.
How to install planks on a kitchen island
Planks go on with construction adhesive and a brad or two per board, straight onto the cabinet’s end and back panels. You’re gluing to a finished cabinet face, not drywall, so a wipe with a damp cloth to get the grease off is the only prep. There are no studs to find on an island and you don’t need them.
Let the boxes sit open in the kitchen for 72 hours first so the wood settles to your home’s humidity. Then:
- Snap or draw a level line at the top of each face, just under the counter lip. Start the first course there and work down, so the full boards sit where you see them and the cut course lands at the floor or the toe kick.
- Lay a bead of adhesive on the back of each plank, press it on, and shoot a brad or two anywhere on the board to hold it while the glue sets. Brads can go wherever they’re handy. The glue does the holding.
- Stagger the joints at least 6 inches course to course. Mix boards from both boxes as you go so the shades spread evenly across all three faces.
- At the corners, let the end-panel board run past the corner on one course and the seating-side board run past on the next. Sand the exposed cut ends lightly.
- Cut around any outlet on the island with a jigsaw, then fit a box extender so the outlet sits flush with the new wood face. Heidi’s island outlet is on the seating side and the planks run right around it.
The whole job is two to four hours for a 6 ft island, plus drying time. The 3/8 inch planks weigh a little over a pound per square foot, so a two-box island adds about 50 pounds, which a cabinet box carries without a thought. Our full install guide covers the cuts and the adhesive in more detail.
Sealing and cleaning an island front
Seal an island front with two coats of matte water-based polyurethane. An island takes more abuse than any wall in the house. Stools scrape the seating side all day, and anything that runs off the counter edge lands on the planks. Raw reclaimed wood soaks up a splash of red wine or tomato sauce, so sealing is not optional here the way it is on a bedroom wall.
Brush the poly on after the planks are up, following the grain, and give the second coat a day before you push the stools back. Matte keeps the surface looking like untreated wood. Gloss turns 100 year old boards into something that looks like a boat deck, so don’t.
Once it’s sealed, cleaning is a barely damp cloth with a drop of dish soap, wiped along the boards. Vacuum the lower courses with a soft brush every couple of weeks, because the base of an island collects crumbs faster than a wall ever will. Skip the steam mop, the oil soap and the melamine sponge. Our care guide goes through the rest.
Brown or grey on an island
Brown planks suit white, cream and navy cabinets with warm floors. Grey planks suit white, black and sage cabinets with cool floors and stainless appliances. Heidi’s kitchen has oak floors and grey drawer fronts, and brown was the right call because the floor and the wood share the same warmth while the grey cabinets keep it from going full cabin.
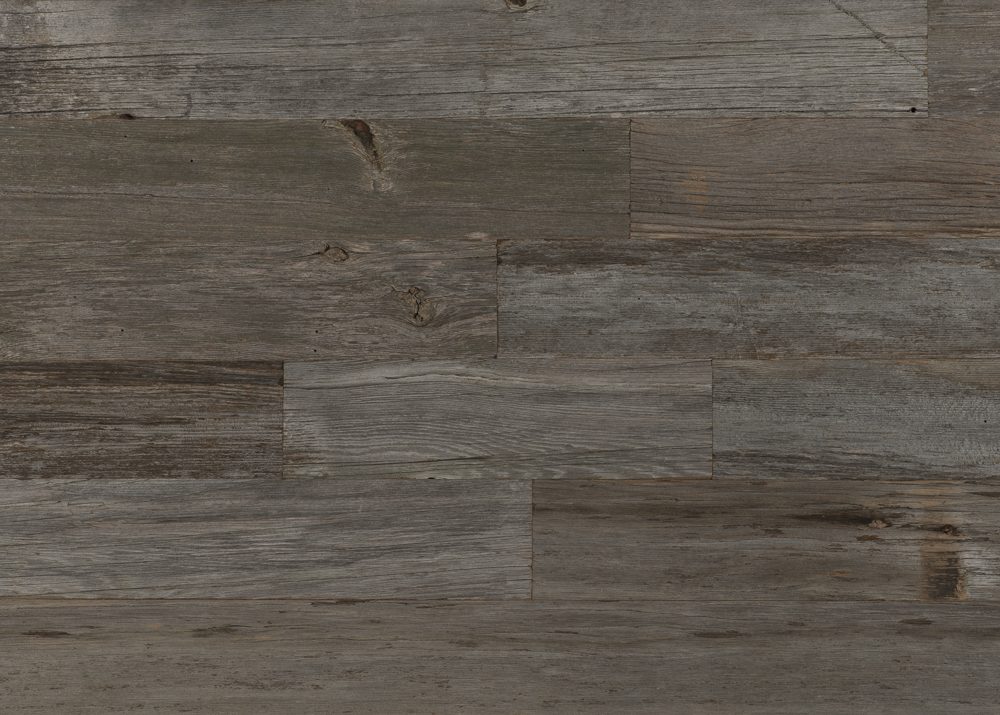
The island is the one place where you can see the planks beside the cabinet color and the floor in a single glance, so this choice shows more than it does on a wall. Lay a few boards from the box on the floor against the cabinet before you glue anything. If you can’t decide, our post on testing a box at home explains why one box is the best sample you’ll get.
Both lines come in 3.5 and 5.5 inch widths. For an island, 3.5 inch is the better pick. The faces are only 3 ft tall, so the narrower boards give you nine or ten courses and a proper staggered pattern. The 5.5 inch boards look best on a bigger surface, like the kitchen wall ideas in our other post.
Frequently asked questions
Can you put reclaimed wood on a kitchen island?
Yes. Reclaimed wood planks glue straight to the end panels and the seating side of a stock cabinet island. Leave the drawer and door side bare, seal the wood with matte water-based polyurethane, and it holds up to stools, shoes and spills.
How much does it cost to cover a kitchen island in reclaimed wood?
Most islands need two 20 sq ft boxes. At $10.25 per sq ft that’s $410 for brown planks, or $540 for grey at $13.50 per sq ft, with free US shipping on every box. Ends only is a single box.
Does reclaimed wood on an island need to be sealed?
Yes. An island front gets kicked, scraped by stools and splashed from the counter, so two coats of matte water-based polyurethane are the rule. Sealed wood wipes clean with a damp cloth.
Will the planks make the island too thick for the counter overhang?
No. The planks are 3/8 inch thick, and a standard counter overhangs the end panels by about an inch. The wood tucks under the counter lip with room left over.
Related reading
- Reclaimed wood kitchen ideas
- Wood backsplash: how to do it and how to seal it
- How much wood do I need for an accent wall
- How to cut around an electrical outlet
- Shop all reclaimed wood planks
See the wood on your own island
One box of brown 3.5 inch reclaimed wood planks covers both ends of an island and ships free to any US address outside Alaska and Hawaii. Order the second box when you’re ready for the seating side.